How to start a burger business: A founder's guide
See article summary
- Opening a burger business in the U.S. costs $30,000 to $130,000 and takes about four months to launch.
- Form an LLC, get a free EIN, and secure a food establishment permit from your health department.
- Insure against grease fires and foodborne illness claims with general liability, property, product, and workers' compensation.
- Price with the food cost formula: ingredient cost divided by target food cost %, aiming for 28% to 35%.
- Keep labor between 25% and 35% of revenue and accept cards with no hardware through JIM at 1.99% per sale.
Opening a burger business in the U.S. typically takes $30,000 to $130,000 in startup costs and several months of permitting and build-out before you can open. The market is a multi-billion dollar industry with steady demand from families, office workers, and late-night diners, so a well-planned burger restaurant or burger joint can hold its own against chain competition.
The ten steps below cover concept validation, legal structure, insurance, location, payments, funding, hiring, marketing, pricing, and scaling.
Step 1: How do you plan and validate your burger business concept?
Market validation for a burger shop takes two to four weeks and costs under $200 if you do the legwork yourself. Start there before you sign a lease.
Research your local market
Spend a few days observing foot traffic patterns near potential locations. Build a simple survey in Google Forms and ask 20 to 30 locals about their price sensitivity and what they want in a burger joint.
Check Google Trends for local search interest in terms like "smash burger" or "vegan burger" to see which burger concept is gaining traction in your city. Use Yelp for Business to map nearby competitors. A frequent mistake is to only read reviews instead of visiting rival shops during their lunch and dinner rushes to see their operations firsthand.
If you are weighing a storefront against a mobile format, our how to start a food truck business guide breaks down the permitting and equipment trade-offs for a burger food truck.
Score your location options
Rank each candidate site on a simple five-point rubric so you compare locations on the same criteria instead of on gut feel.
- Foot traffic: count passersby during lunch (11 a.m. to 1 p.m.) and dinner (5 p.m. to 8 p.m.) on two weekdays and one weekend day.
- Visibility: can drivers and walkers see your storefront signage from at least 50 feet away?
- Parking and access: is there parking within a short walk, and is the entrance accessible?
- Competitor proximity: count burger and fast food spots within a one-mile radius; more than five is crowded.
- Rent as a percentage of projected sales: aim for rent under 10% of expected monthly revenue.
A site that scores above 18 out of 25 is worth a second visit. This scoring rubric is the kind of proprietary framework that separates a serious founder from one who leases on impulse.
Estimate your startup costs
A typical itemized budget adds up to roughly $30,000 to over $130,000, depending on your city and the scale of your operation. Here is a standard breakdown.
- Kitchen equipment: $20,000 to $100,000
- Initial food inventory: $5,000 to $10,000
- Licenses and permits: $1,000 to $5,000
- Lease security deposit: $5,000 to $15,000
Securing a location and purchasing equipment represent the largest shares of that total, so thorough financial planning from day one sets you up for success.
Here are 3 immediate steps to take:
- Visit three direct competitors during their lunch and dinner rushes.
- Draft a short survey for potential customers in your target area.
- Score your top three locations on the five-point rubric above.
Step 2: How do you set up your legal structure and licenses?
Most independent burger shops register as a Limited Liability Company (LLC) because it protects your personal assets if the business faces debt or lawsuits, and it keeps taxes simple. An LLC passes profits and losses through to your personal income, which simplifies filing compared to a corporation. File the LLC paperwork with your state's Secretary of State; the fee usually runs $50 to $500.
Secure your permits and licenses
At the federal level, you need an Employer Identification Number (EIN) from the IRS. You can apply for an EIN online for free in minutes; it functions like a Social Security number for your business and is necessary for hiring employees and filing taxes.
Your state and city add their own rules. Key documents include a business license, a food handler's permit for you and your staff, and a health department permit. These can cost between $100 and $1,000 and take several weeks to process, so start early.
When you apply for your business license, also get your seller's permit from your state's tax agency. Many new owners overlook this step, but you need it to collect sales tax. Forgetting it can create significant issues with your state's department of revenue later on.
Here are 3 immediate steps to take:
- File LLC paperwork with your state's Secretary of State.
- Apply for a free EIN on the IRS website.
- Contact your local health department to request the food establishment permit application.
Step 3: What insurance does a burger restaurant need?
A burger restaurant carries specific risks like grease fires and foodborne illness claims, so a standard policy is rarely enough. Plan for a package that covers customers, property, product, and staff.
Get the right insurance coverage
Request quotes from at least three providers, because premiums vary widely by location, building, and payroll. The core policies to compare:
- General liability: covers customer injuries like a slip and fall. Aim for at least $1 million in coverage.
- Commercial property: protects your building and equipment. A frequent oversight is underinsuring the kitchen, so confirm the policy covers the full replacement cost of grills and fryers.
- Product liability: your defense against claims of food poisoning or allergic reactions. It is often bundled with general liability.
- Workers' compensation: if you have employees, most states require this. It covers medical costs and lost wages for on-the-job injuries.
Consider providers that specialize in restaurants, such as The Hartford, Next Insurance, or the Food Liability Insurance Program (FLIP), because they understand kitchen-specific risks and can often tailor coverage to a burger operation.
Here are 3 immediate steps to take:
- Request quotes from three insurance providers that specialize in restaurants.
- Ask each insurer whether they bundle general and product liability coverage.
- Check your state's website to confirm its workers' compensation requirements.
Step 4: How do you choose a location and buy kitchen equipment?
A typical burger spot needs 1,200 to 2,500 square feet. When you scout locations, confirm they have commercial zoning that permits restaurant operations. Your city's planning department publishes this information. Good visibility and foot traffic are the two location factors you cannot fix later.
When you talk to landlords, ask about a Tenant Improvement (TI) allowance to help pay for the build-out. You can also negotiate an exclusivity clause, which stops the landlord from leasing space to another burger restaurant in the same building or complex.
Purchase your kitchen equipment
Buy new or used, but some items are worth the investment in new condition. A frequent mistake is to underestimate ventilation costs, so get quotes for your hood system early; it can easily cost over $10,000.
- Commercial griddle (36 to 48 inch): $2,000 to $7,000
- Deep fryers (2): $1,500 to $4,000
- Type 1 hood vent system: $7,000 to $20,000+
- Refrigeration (walk-in or reach-in): $5,000 to $15,000
For equipment and initial inventory, a supplier like Restaurant Depot caters to independent owners and usually does not require high minimum order quantities, which helps manage cash flow at the start.
Here are 3 immediate steps to take:
- Identify three potential locations with the correct commercial zoning.
- Ask landlords about a Tenant Improvement (TI) allowance during initial talks.
- Get at least two quotes for a Type 1 hood vent installation.
Step 5: How do you set up payment processing?
Most customers expect to pay with cards or digital wallets, so you need a reliable point-of-sale (POS) setup. Many new owners get surprised by hidden fees or long-term contracts, so compare options on rate, hardware, and contract length before you commit.
Choose a payment solution
Typical processing rates from traditional providers range from 2.5% to 3.5% per sale, often plus monthly hardware costs. The comparison below lays out the three common paths so you can pick by how you actually sell.
| Option | Typical rate | Hardware | Deciding criterion |
|---|---|---|---|
| JIM Tap to Pay | 1.99% per sale | Your phone, no extra hardware | Counter service, food trucks, and line-busting during a lunch rush |
| Mobile card reader | About 2.5% to 2.75% | Separate Bluetooth reader | Pop-ups and food trucks that want a physical reader |
| Traditional POS terminal | 2.5% to 3.5% plus monthly fees | Countertop terminal | High-volume full-service restaurants with complex orders |
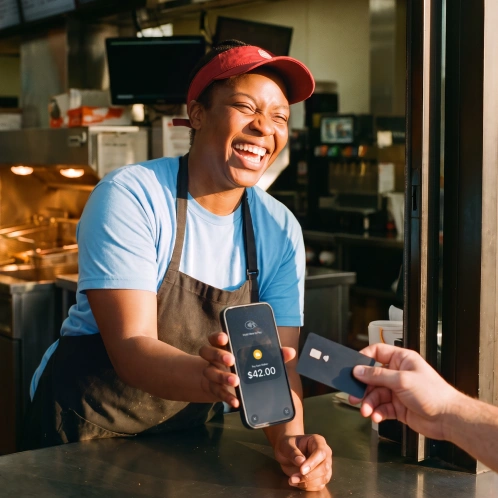
JIM charges a flat 1.99% per Tap to Pay sale with no hidden costs and no extra hardware, which makes it a strong fit for a burger shop that takes payments at the counter, curbside, or off-site at events. You can accept Visa, Mastercard, American Express, and Discover, and funds land on your JIM card the moment the sale completes.
Consider a traditional POS terminal if you need a kitchen display system, table mapping, or integrated inventory, because those features matter more than the rate difference at high volume.
How JIM works
- Get started: download the JIM app for iOS or Android.
- Make a sale: type the sales amount, hit sell, and ask your customer to tap their card or device on your phone.
- Access funds: your money is available on your JIM card as soon as the sale clears, with no waiting for bank transfers.
Here are 3 immediate steps to take:
- Compare the transaction fees and contract terms of two traditional POS providers.
- Download the JIM app to explore its interface and Tap to Pay flow.
- Decide whether a mobile-first payment solution fits your service model.
Step 6: How do you fund the business and manage finances?
SBA 7(a) loans are a common path for restaurant startups. The maximum 7(a) loan is $5 million, and the SBA guarantees up to 75% of the loan (85% for loans of $150,000 or less). The SBA caps the interest rate above a base rate, and the exact cap depends on loan size and whether the rate is fixed or variable. Lenders commonly want a credit score above 680 and a down payment of 10% to 20%, though the SBA sets no fixed credit-score minimum. You can review the full terms on the SBA 7(a) loan program page.
You might also look into equipment financing, which is secured by the equipment itself and can be easier to qualify for. Your local Small Business Development Center (SBDC) is a free resource for information on regional grants or microloan programs under $50,000.
Calculate your working capital
Many new owners focus on startup costs but forget about day-to-day expenses. You need enough working capital to cover at least your first six months of operations, including rent, payroll, utilities, and marketing before the business turns a profit.
For a small burger shop, that cushion can run from $50,000 to over $150,000. A detailed operating budget is the only way to know for sure. Underestimating this figure is a frequent reason new restaurants fail within their first year, so map out your monthly cash needs before you open.
Here are 3 immediate steps to take:
- Review the requirements for an SBA 7(a) loan on the official SBA website.
- Create a six-month operating budget to estimate your working capital needs.
- Schedule a free consultation with your local Small Business Development Center (SBDC).
Step 7: How do you hire and run your team?
Your team brings your burger concept to life. For a small shop, you will likely need two or three core positions to start, and a good team is the difference between a smooth service and a chaotic one.
Define your key roles
Set pay with current local data in mind. The BLS Occupational Employment and Wage Statistics for restaurant cooks publishes the hourly wage distribution by region; use it to set pay that is competitive for your area. Plan for roughly $16 to $22 per hour for an experienced grill cook and $14 to $18 for front-of-house roles, adjusted upward in high-cost cities.
- Grill cook: handles all cooking and plating. This is your most important kitchen hire.
- Cashier or front of house: takes orders, manages payments, and keeps the dining area clean.
- Prep cook or dishwasher: supports the grill cook and keeps the kitchen clean. This is often an entry-level position starting around minimum wage.
All employees must hold a valid Food Handler's Permit, as required by your local health department. Train them on your specific recipes and your brand's story, because a well-informed team provides better service and maintains quality.
To manage schedules and team communication, a platform like Homebase or 7shifts helps you build schedules, track hours, and send updates to your staff's phones, which avoids confusion over text messages or paper schedules.
A standard restaurant industry target is to keep labor between 25% and 35% of revenue. Many new owners overstaff during slow periods, which eats into profits. Use your first few weeks of sales data to adjust schedules and optimize staffing levels.
Here are 3 immediate steps to take:
- Write job descriptions for a grill cook and a cashier.
- Check your local health department's website for Food Handler's Permit requirements.
- Compare the features of a scheduling tool like Homebase or 7shifts.
Step 8: How do you market your burger business and win customers?
Your Google Business Profile is usually the first place a hungry customer finds you, so claim and complete it before you open. Add at least 10 high-quality photos of your food and space, because diners decide where to eat from photos and reviews more than from any ad.
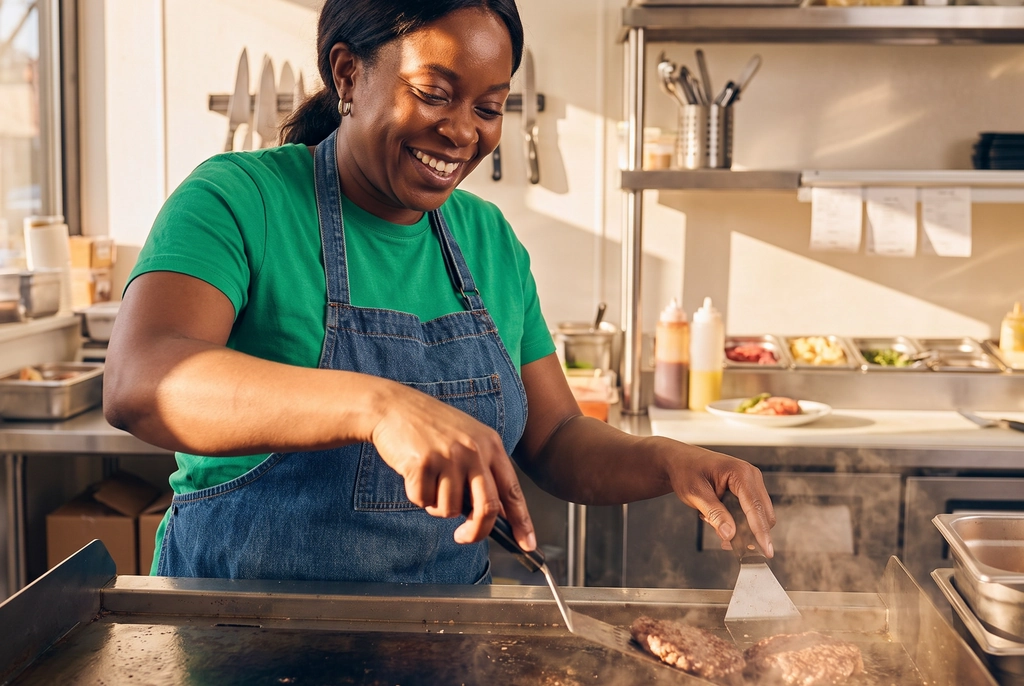
Next, create an Instagram account dedicated to your food. Focus on close-up photos and short videos of your burgers on the grill. A common mistake is to chase followers instead of engaging with local accounts and hashtags to build a community.
Launch with local buzz
A grand opening special creates immediate traffic. An offer like "free fries with any burger" for your first week encourages trial and gets people talking. You can also partner with local food bloggers for a pre-opening tasting event.
To encourage repeat visits, implement a simple loyalty program. A physical "buy nine, get the tenth free" punch card is inexpensive and effective. Your goal should be to see 20% to 30% of your opening week customers return within the first month.
Here are 3 immediate steps to take:
- Claim and complete your Google Business Profile with at least 10 photos.
- Identify three local food influencers and draft an invitation for a complimentary meal.
- Design a simple "buy nine, get one free" punch card for your launch.
Step 9: How do you price your menu for profit?
The most direct way to price a menu is the cost-plus model, and the core formula is simple.
Food cost formula: Ingredient Cost divided by Target Food Cost % equals Menu Price.
Calculate your food cost percentage
First, calculate the exact cost of ingredients for one burger. Aim for a food cost percentage between 28% and 35%, a standard restaurant industry benchmark. Many new owners guess this number, which hurts profitability from day one.
The illustrative worksheet below shows the math across three burger tiers. These are example numbers to demonstrate the formula, not suggested retail prices for your menu.
| Burger tier | Example ingredient cost | Target food cost % | Menu price (formula) |
|---|---|---|---|
| Classic single | $2.50 | 30% | $8.33, rounded to $8.99 |
| Signature double | $3.50 | 30% | $11.67, rounded to $11.99 |
| Gourmet specialty | $5.00 | 32% | $15.63, rounded to $15.99 |
For a burger that sits inside the broader fast food category, our how to start a fast food business walkthrough applies the same cost-plus logic at a category level.
Analyze competitor pricing
With your costs calculated, look at what your competitors charge. Review the menus of three nearby burger spots. You do not need to be the cheapest, but you must understand your position in the market, because pricing too low can signal poor quality to customers.
Consider a tiered strategy. You could offer a high-margin classic burger around $9 and a specialty burger with premium toppings around $15. High-profit add-ons like bacon or avocado for an extra $2 can significantly boost your average check size.
Here are 3 immediate steps to take:
- Calculate the exact ingredient cost for your signature burger.
- Set a target food cost percentage for your business, ideally between 28% and 35%.
- Analyze the menus and pricing of three direct competitors in your area.
Step 10: How do you maintain quality and scale?
Your kitchen needs clear standards. Have your lead cook get ServSafe certified, and create a daily checklist for cooks to verify patty weight, internal temperature, and assembly time. Many new owners skip written checklists, which leads to inconsistency.
For service, track customer complaints and online reviews. A good target is a 4.5-star average on Google or Yelp. Responding to all reviews within 24 hours shows you care and helps manage your reputation, and this habit can turn a bad experience around.
Know when to grow
Once you have six months of consistent profitability and regular wait times during peak hours, you can consider expansion, whether a second location or a food truck. Before you expand, document your operations so you can replicate your success.
As you grow, inventory management becomes more complex. Software like MarketMan helps you track food costs and supplier pricing, which lets you maintain your target food cost percentage even at higher volume and spot waste before it hurts your bottom line.
Here are 3 immediate steps to take:
- Create a daily quality control checklist for your kitchen staff.
- Set a goal to respond to all new online reviews within 24 hours.
- Analyze your labor cost percentage from the last three months to assess staffing.
Your path from idea to opening
Use this timeline to sequence the work so permits and build-out stay on schedule.
| Phase | Target | Key actions |
|---|---|---|
| Weeks 1 to 2 | Plan and validate | Market research, file LLC, apply for EIN |
| Month 1 to 2 | Build and permit | Sign lease, submit health permit, install equipment |
| Month 3 | Hire and train | Recruit staff, finalize menu pricing, run a soft open |
| Month 4 | Launch | Grand opening special, push local marketing |
As you build, keep your operations simple. For payments, JIM lets you accept cards on your phone for a flat 1.99% fee with no extra hardware, so you can focus on the food. Download JIM to get started.
Frequently Asked Questions
How much does it cost to start a burger business?
Is a burger business profitable?
How long does it take to open a burger business?
What licenses do I need to start a burger business?
What insurance does a burger restaurant need?


Sell and get paid in seconds with Jim